Preliminary Testing

IMG_3042

IMG_3050

IMG_3047

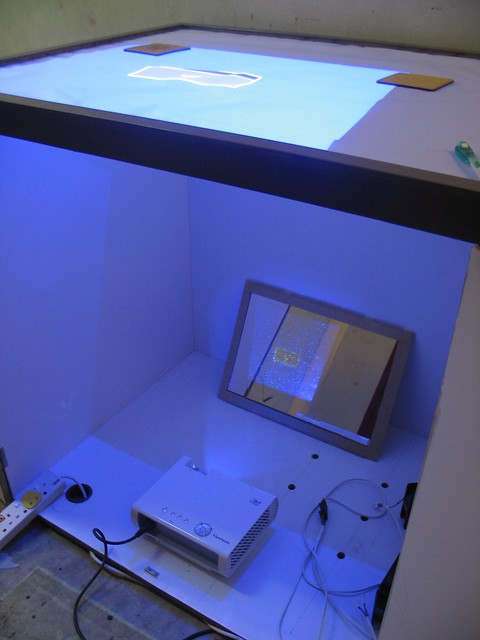
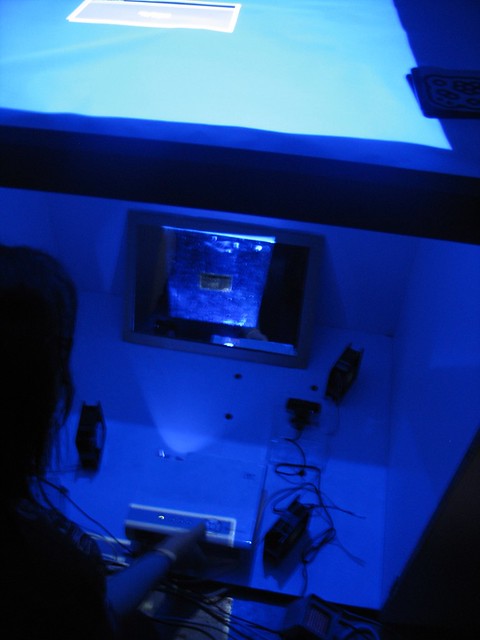
25 JULY: me and dominic conducted the first preliminary hardware tests within the actual physical box which will be used in the exhibition. the following discoveries were made:
  • IR light reflects somewhat differently from visible light. rather than defusing in the same way that visible light usually defuses on normal surface, it bounces straight off some surfaces which might be expected to absorb visible light, like cardboard
  • even though you cannot see IR light, IR LEDs still get very hot if left on for long. also, projectors get very very hot as well, so computer fans and good ventilation/air conditioning will be ESSENTIAL in a DIY tangible table setup
  • infrared light hotspots (insufficient diffusion and spotlights instead) adversely affect the detection of fidicuals
  • accidentally sticking your finger inside a computer fan does not actually result in injury or death
  • tracing paper will warp with moisture over time. an additional acrylic sheet is essential for holding down tracing paper and for improving sensation of touch on the touch surface.
  • using developed film as a "poor man's IR filter" is not effective enough for the use of a tangible touch table which wants to detect fidicual symbols. purchasing specialised IR filters and additional focal lenses will be crucial to the success of the project.


IMG_3071

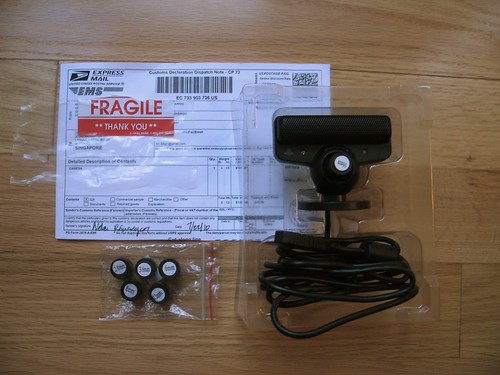
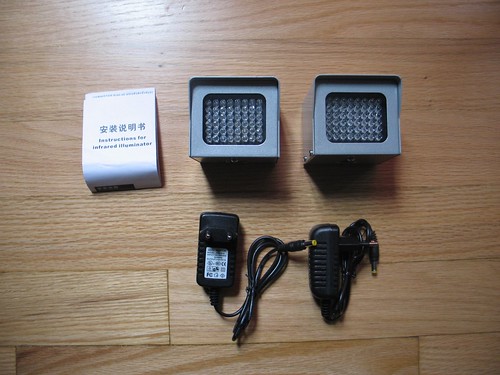
29 JULY: After significant wrangling and wrestling with Singpost's Speedpost service, I received the 2nd PS3 eye camera with m12 mount with 850nm IR filter and set of lenses ranging from 2.8mm to 16mm. (these were purchased online from peauproductions, which stocks a lot of essential equipment for DIY touch surfaces)

With the 16mm lens, reactivision can now detect 3cm fiducials at a range of 1 metre!


footnote: i assumed i needed the BIGGEST lens initially, but later dominic showed me that the smaller lenses could SEE MORE, and the final lens we went with for our table was 3.6mm

Infrared LED Lights

IMG_3017

Infrared LED Lights
S8030-30-C-IR (850NM) + 12V power source


These will have to be pointed to the white walls of the inside of the box in order to diffuse the IR light onto the rear projection. We have bought 2 lights at the moment but when we finally can test it out in the box itself, then we will know whether 2 will suffice or not.

As these pre-assembled lights with power source are more commonly used in conjunction with surveillance cameras, they have a light sensor which automatically turns them off when there is sunlight, and turns them on only when its dark. As we won't need this feature, we will probably block out the light sensor with electrical tape.


I am getting a backup and preassembled PS3 Eye camera from the incredibly helpful Peau Productions as I am seriously very worried about camera burnout considering the length of time it will be on in public, and because I can already see that the OEM (original equipment manufacturer) lens is unable to focus properly on my fidicual symbols. With a preassembled PS3 Eye with m12 mount, at least if I already have a backup camera I can quickly remount the new lens on the other camera.

There have been some other delays with my production timeline, and with only 46 days to go, I am very very worried about many things.

Installing Reactivision Properly

IT EXISTS...

Above: Round Reactable at NTU ADM


This afternoon I met Yanying, one of the people who worked on the above round reactable which I saw at NTU, and she was kind enough to give me lots of advice on the process of building and testing such setups. One of the things I've learnt was that I really should think about including some reciprocal visual/audio feedback for all the interactions so that users know that their interaction is being registered by the machine.

As for more mucking around with using the PS3 Eye with Macam and reactivision, I was going to test some parts of the physical setup on a macbook tomorrow (as I was a dunce and got the wrong connector), so I reinstalled reactivision and macam on my 4 year old macbook.


For my future reference... Mini DVI Versus Mini DisplayPort
I've given up and bought the Mini DP for SGD17 on ebay

Do note that one step which is very easy to miss in the installation process of macam is the proper installation of the quicktime component. Boy I almost had a heart attack there when I opened up reactivision and THERE WAS NO MACAM PS3EYE. But then i realised that installing macam alone is not enough. One obviously has to install the quicktime component in order for all programs to detect the camera.

After recovering from the unnecessary apoplectic fit you just had when you thought that your USB camera might never ever be detected in reactivision and your reactable might explode, quit all the related programs which are currently open. Go to the Macam installer again. Drag the macam.component into "/Library/QuickTime".


Then restart reactivision and press "O" to see the following dialogue, which shows that the PS3 Eye can indeed be detected in reactivision.


Infrared light is present in sunlight - so that is me in a darkened room, with my face lit mostly by the evening sun. Out of the 1 kW/sq m of irradiance sunlight sends down to earth, apparently 527 watts is infrared radiation (light which is visible to this IR camera), 445 watts is visible light (the light we can see), and 32 watts is ultraviolet radiation (light which causes sunburns and skin cancer).

PS3 Eye Modified for Infrared

IMG_2996


Good news, world. After the previous night's lows and minor setbacks, this is something akin to a miracle. After Dominic's miraculous and patient disassembly of the camera, following the faithful instructions of the following videos, tonight there has been success in modifying the PS3 Eye for IR light!


Those who attempt to take out this camera may want to note that it is very hard to open the casing, and that the removal of the lens may benefit from the use of a slightly heated metal blade or tool to cut and melt the plastic around the lens area until it can be gently popped out - brilliant method which Dominic thought of.

We cut up an old negative which had been developed, popped it inside the lens, and then tested it with a TV remote. It picked up the flickering IR signal very clearly.

Other notes:
  • Noticed a small cloudy pattern - not sure if my negative had a cloud in it which was not so visible to the human eye. Must ensure that negatives are actually totally blank and not just one of those awkward pointless frames of blue skies with faint clouds which I am so fond of taking.
  • I will have to build a new housing for the camera as much brute force is required to open the housing and its nearly impossible to put back together.
  • Purchasing online may be more tricky as there are apparently two types of cameras out there (US vs Non-US, both with different lenses). Having bought it from the internet, I was lucky that my camera was the good type which I needed in particular for this project.
  • One sheet of negatives may not suffice; will need to replace the negative and put multiple sheets of cut negatives inside.

Besides modding this camera, there are many more unforeseen horrors to be tackled, but at least the camera is actually working after initial attempts at modification!

IMG_2997
The CMOS Sensor

Followers